

Whether you’re planning a short weekend getaway or embarking on a cross-country expedition, having the right luggage setup is crucial to ensure a smooth and enjoyable experience. In this comprehensive guide, we will delve into the world of bikepacking luggage and provide you with everything you need to know to make informed decisions when it comes to packing your essentials.
From different types of bags to consider, to tips on how to pack efficiently and maximize space, we’ve got you covered. But before we dive into the nitty-gritty details, let’s start with a captivating fact: Did you know that choosing the right bikepacking luggage can significantly impact your overall biking experience? Picture this: you’re pedaling through rugged terrains, surrounded by breathtaking landscapes, with nothing weighing you down except for the bare essentials packed neatly into your bike bags.
The right luggage setup can make all the difference in terms of comfort, balance, and ease of access to your gear. So, whether you’re a seasoned bikepacker looking to upgrade your gear or a newbie eager to embark on your first adventure, keep reading as we unveil the ultimate guide to bikepacking luggage. Get ready to discover the best options on the market, learn expert packing techniques, and gain valuable insights that will take your bikepacking adventures to new heights. Let’s get started!
Understanding the Different Types of Bikepacking Bags
When it comes to bikepacking, having the right bags to carry your gear is essential. There are several different types of bikepacking bags available, each designed to serve a specific purpose and cater to different needs. Let’s take a closer look at some of the most common types:
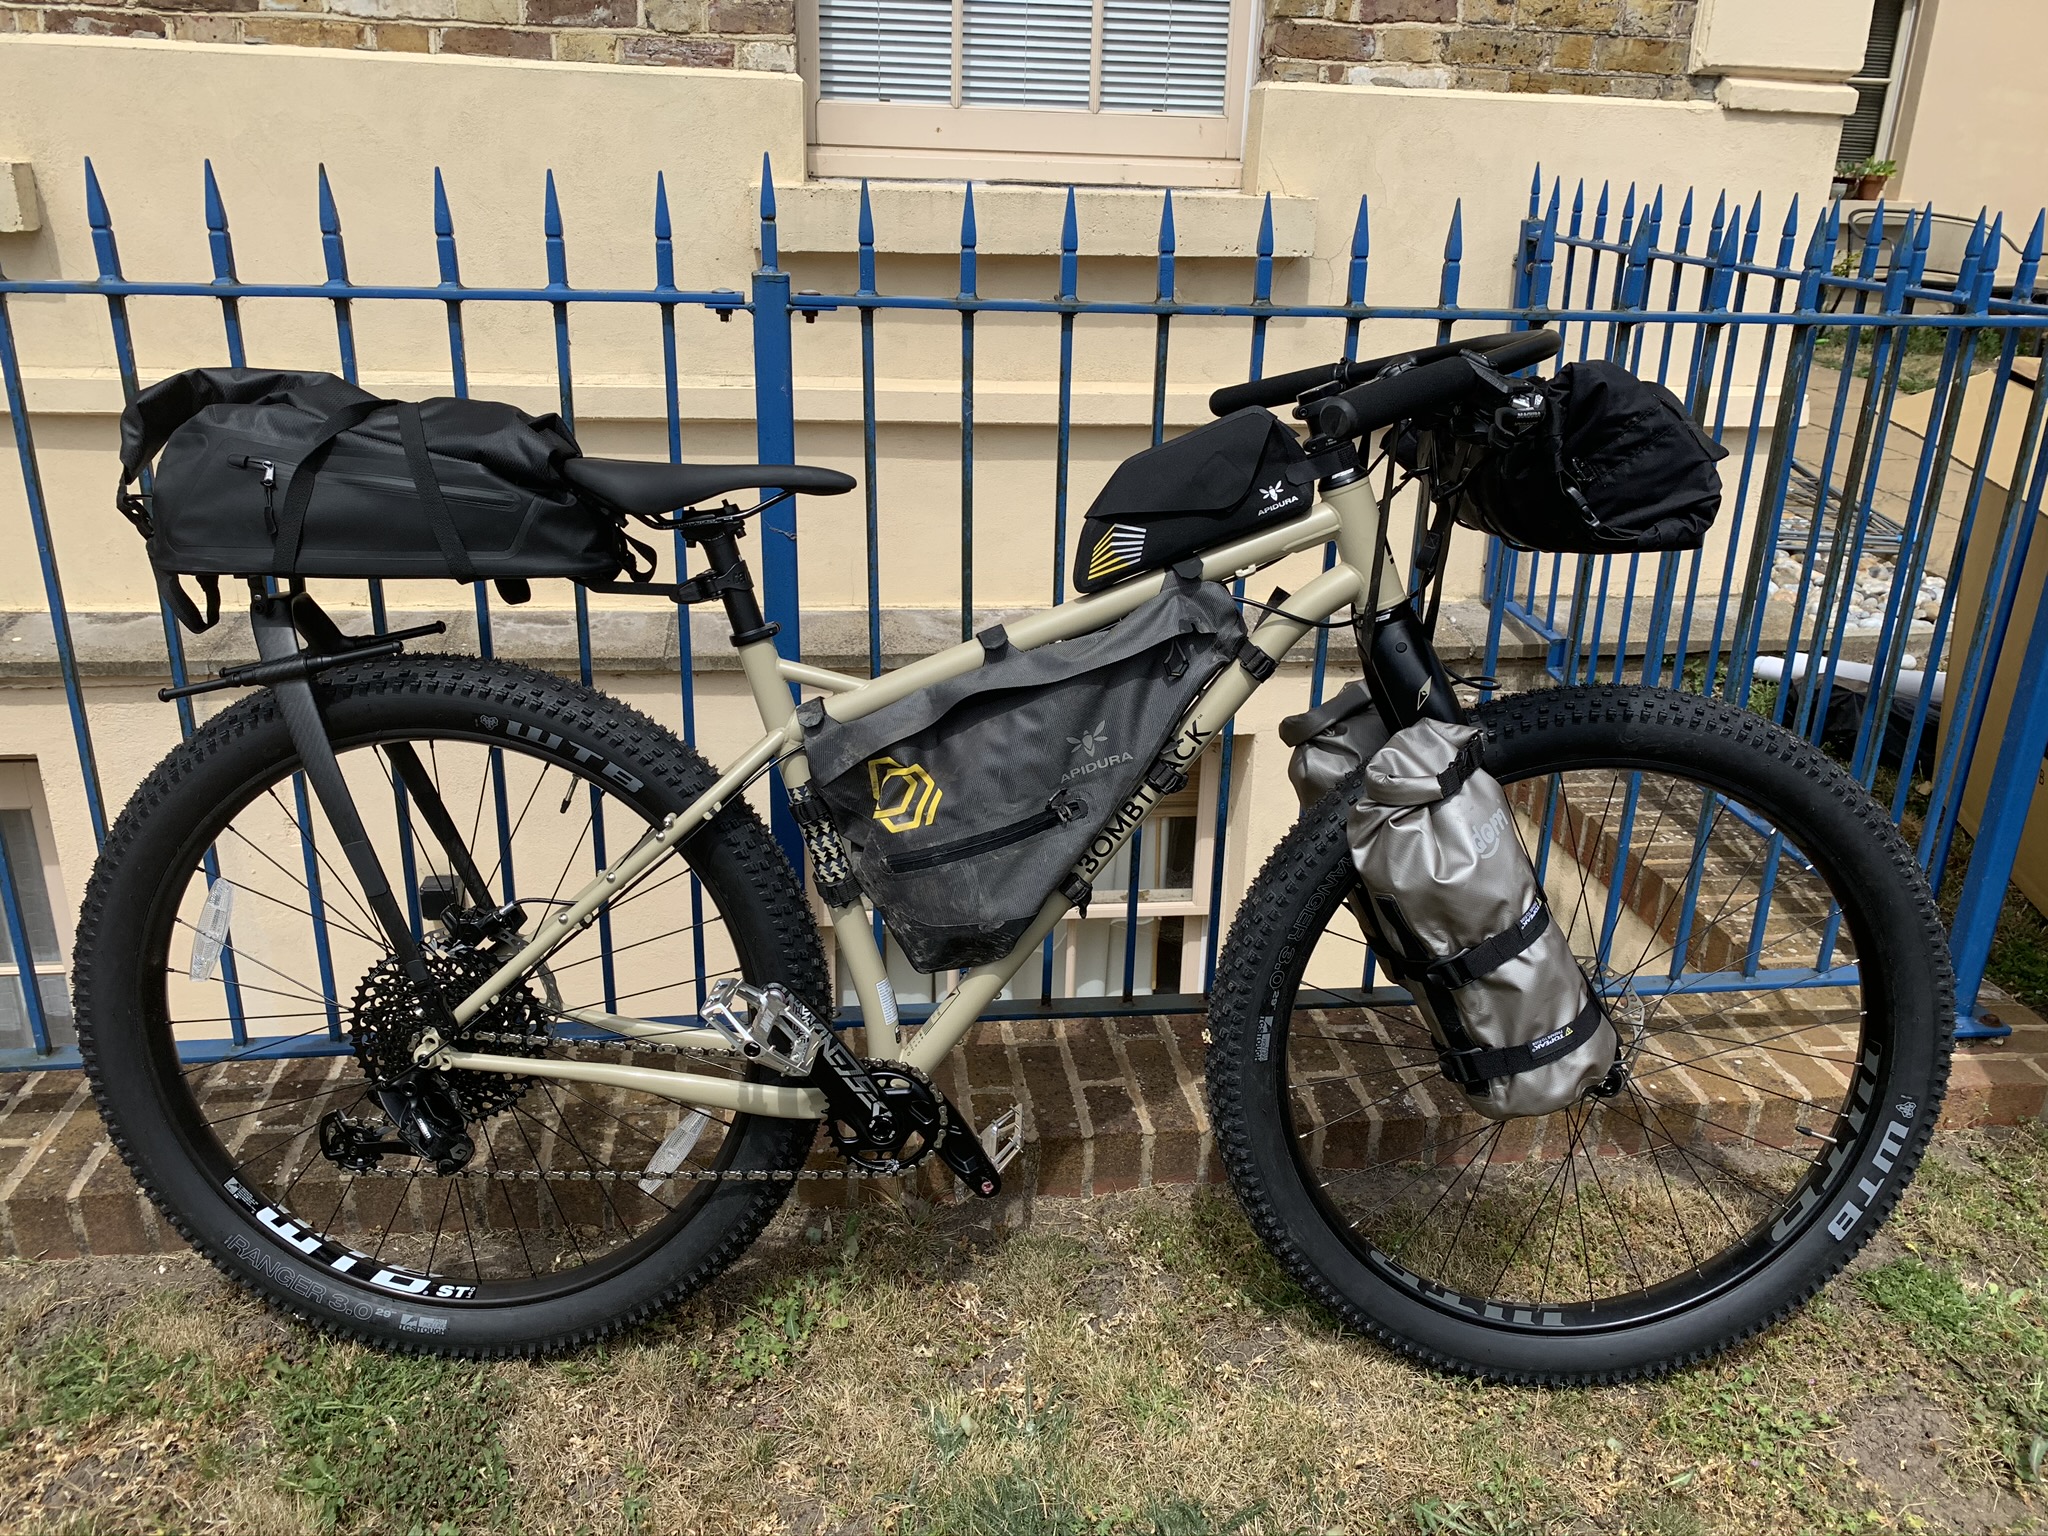
1. Frame Bags: Frame bags are designed to fit within the triangle of your bike frame. They are perfect for storing heavier items like tools, spare parts, and food. Frame bags help distribute weight evenly and keep your center of gravity low, enhancing stability while riding.
2. Handlebar Bags: Handlebar bags attach to your handlebars and provide easy access to items you may need while riding, such as snacks, a camera, or a map. They typically have a large main compartment and additional pockets for organizing smaller items.
3. Seat Packs: Seat packs attach to the seatpost and saddle rails and offer ample storage space for bulky items like sleeping bags or clothing layers. They are designed to be aerodynamic and keep weight centered on the bike.
4. Top Tube Bags: Top tube bags sit on top of the top tube, just behind the stem. They are ideal for storing frequently accessed items like snacks, sunscreen, or a phone. Top tube bags often have clear plastic tops that allow you to see your phone’s screen or use a GPS device without removing it from the bag.
5. Panniers: Panniers are larger bags that attach to racks mounted on the front or rear of your bike. They offer significant storage capacity and are great for carrying clothing, camping gear, or groceries during longer trips.
No matter which type of bikepacking bags you choose, it’s important to consider factors such as weight distribution, accessibility, and durability. Investing in high-quality bags that are specifically designed for bikepacking will ensure that your gear stays secure and protected throughout your journey.
Organizing Your Bikepacking Bags: The Perfect Setup
Now that you have an understanding of the different types of bikepacking bags available, let’s talk about how to organize them for the perfect setup. Proper organization is key to maximizing space, maintaining balance, and ensuring easy access to your essentials. Here are some tips:
1. Categorize Your Gear: Before packing your bags, categorize your gear into groups such as clothing, food, tools, and sleeping equipment. This will help you visualize how much space each category requires and plan accordingly.
2. Use Compression Sacks or Dry Bags: Compression sacks or dry bags can help reduce the size of bulky items like sleeping bags or clothing layers while keeping them protected from moisture. They also make it easier to fit everything into your bags without sacrificing organization.
3. Pack Heavy Items Low: To maintain balance and stability while riding, pack heavier items closer to the bottom of your frame bag or seat pack. This will prevent your bike from feeling top-heavy and affecting maneuverability.
4. Keep Frequently Used Items Accessible: Store items that you may need during the ride, such as snacks or a rain jacket, in easily accessible pockets like handlebar bags or top tube bags. This way, you won’t have to dig through your other gear every time you need something.
5. Distribute Weight Evenly: Spread out the weight evenly between your front and rear bags to maintain balance. Avoid packing all the heavy items in one bag, as it can make your bike feel imbalanced and affect your control.
By following these organization tips, you’ll be able to make the most of your bikepacking bags and enjoy a well-balanced and efficient setup throughout your journey.
Waterproofing and Weatherproofing Your Luggage
When embarking on a bikepacking adventure, it’s crucial to protect your gear from the elements. Rain, mud, and dust can quickly ruin your belongings if they’re not properly waterproofed or weatherproofed. Here are some essential tips to keep in mind:
1. Invest in Waterproof Bags: Look for bikepacking bags that are specifically designed to be waterproof or come with rain covers. These bags will keep your gear dry even during heavy downpours.
2. Use Dry Bags or Pack Liners: For added protection, consider using dry bags or pack liners inside your bags. These waterproof sacks create an extra layer of defense against moisture and ensure that even if water seeps into one bag, it won’t affect the rest of your gear.
3. Seal Openings: Pay attention to any openings or seams on your bags that may let water in. Use waterproof tape or seam sealant to seal these areas and prevent water from seeping through.
4. Wrap Electronics in Waterproof Cases: If you’re carrying electronics like a phone or camera, make sure to place them in waterproof cases before stowing them away in your bags. This will protect them from water damage.
5. Dry Gear Thoroughly: If you encounter rain or wet conditions during your ride, take the time to dry out your gear thoroughly once you reach your destination. This will prevent mold and mildew from forming and ensure that your bags are ready for the next day’s adventure.
By taking the necessary steps to waterproof and weatherproof your bikepacking bags, you can rest assured that your gear will stay dry and protected throughout your journey, regardless of the weather conditions.
Maintaining Balance and Stability while Riding
One of the most important aspects of bikepacking is maintaining balance and stability while riding. Here are some tips to help you achieve a smooth and controlled ride:
1. Pack Light: The lighter your load, the easier it will be to maintain balance. Only pack essential items and avoid unnecessary weight.
2. Distribute Weight Evenly: As mentioned earlier, distribute weight evenly between your front and rear bags to maintain balance. This will prevent your bike from feeling imbalanced or top-heavy.
3. Secure Your Bags Properly: Make sure all straps, buckles, and attachments on your bags are securely fastened. Loose or shifting bags can throw off your balance and affect stability.
4. Practice Proper Riding Technique: Maintain a relaxed grip on the handlebars, keep a steady cadence, and shift gears smoothly to maintain control over your bike.
5. Start Slowly: If you’re new to bikepacking or carrying heavy loads on your bike, start with shorter trips or practice rides to get used to the added weight and adjust to the changes in balance.
Maintaining balance and stability while riding is crucial for both safety and comfort during a bikepacking adventure. By following these tips, you’ll be able to enjoy a smooth ride without compromising control.
Recommended Brands and Products for Bikepacking Bags
Now that you have a good understanding of the different types of bikepacking bags and how to organize them, let’s explore some recommended brands and products to consider:
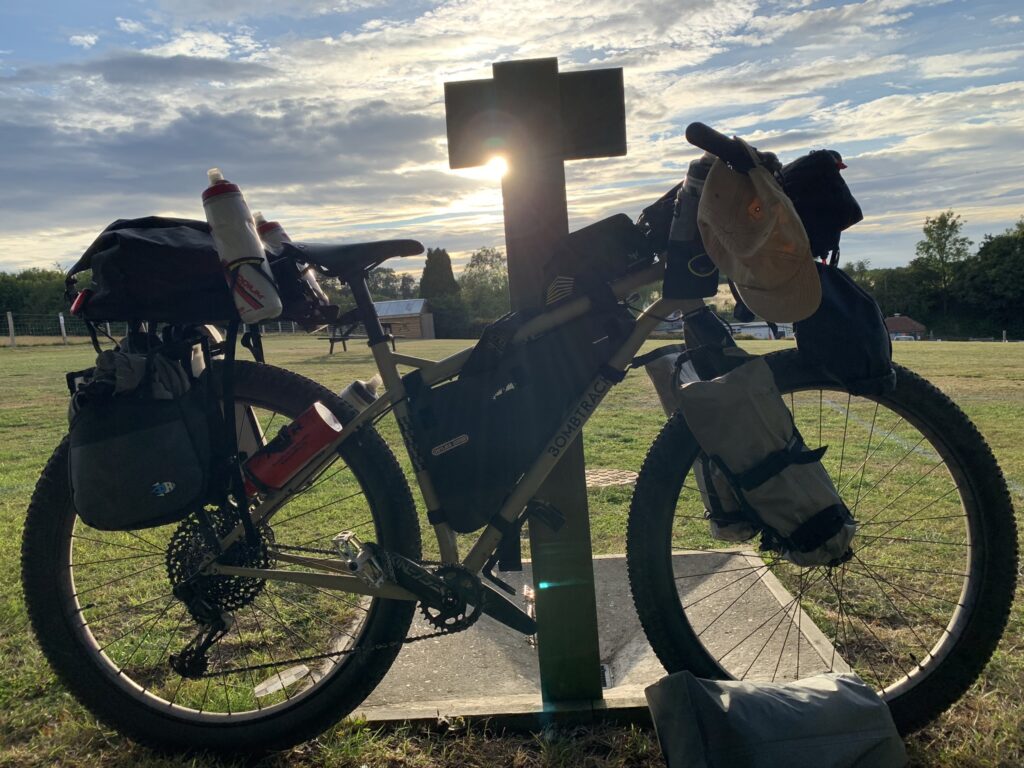
1. Ortlieb: Ortlieb is a well-known brand in the bikepacking world, offering a wide range of high-quality waterproof bags that are durable and reliable.
2. Revelate Designs: Revelate Designs specializes in bikepacking bags and offers a variety of options for different types of bikes and riding styles. Their bags are known for their durability and innovative designs.
3. Apidura: Apidura is another popular brand among bikepackers, known for their lightweight yet robust bags. They offer a range of sizes and styles to suit different needs.
4. Blackburn: Blackburn offers a selection of affordable bikepacking bags without compromising on quality. Their bags are designed to withstand rugged conditions while keeping your gear secure.
5. Topeak: Topeak offers a range of versatile bikepacking bags that cater to different preferences and budgets. They are known for their user-friendly designs and durability.
These are just a few examples of reputable brands in the bikepacking industry. It’s always recommended to do thorough research, read reviews, and consider your specific needs before investing in bikepacking bags.
Elevate Your Bikepacking Experience with the Right Luggage Setup
Bikepacking is an incredible way to explore the great outdoors, challenge yourself physically, and create unforgettable memories. By choosing the right luggage setup, organizing your gear efficiently, waterproofing your bags, maintaining balance while riding, and investing in quality products, you can elevate your bikepacking experience to new heights.
Remember, bikepacking is all about the journey, not just the destination. So take your time to enjoy the ride, immerse yourself in nature, and embrace the freedom that comes with traveling light on two wheels. Happy bikepacking!